
In this post, we have discussed OTP Management in Saral GST. You can set OTP in Saral GST for the automated process from software to GSTN and vice-versa.
To start with, the management of OTP will be required when the process of return uploading or data download to software is done using GSP Services.
Firstly, before going for the OTP management process, ensure that GSP service is enabled in the software. Also, API Access is enabled in GST Portal.
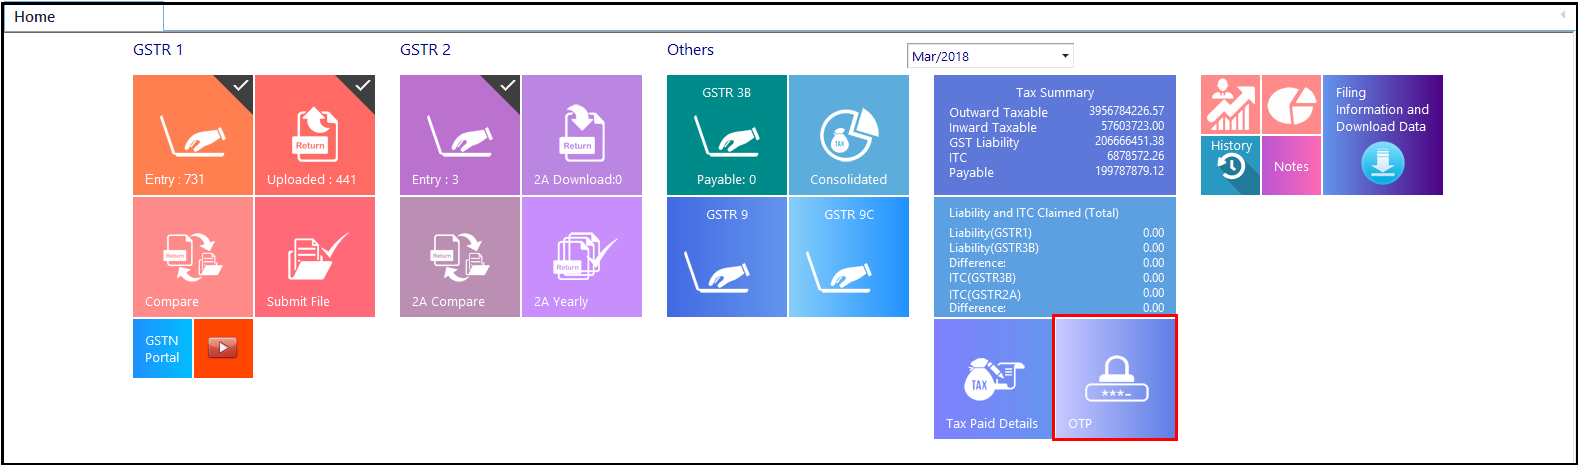
To enter OTP, go to OTP in Home screen.
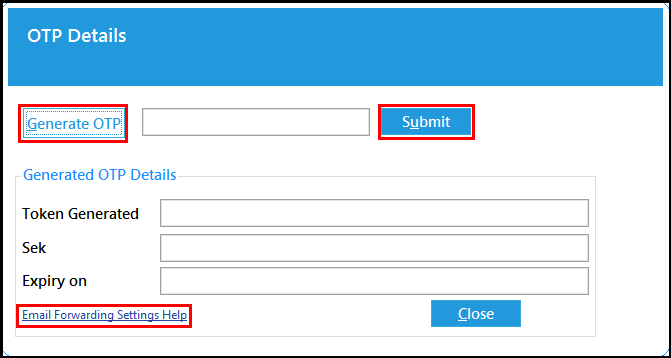
In the OTP Details window, click on Generate OTP to receive an OTP on the GSTN profile registered mobile number. On receiving the OTP, you can enter the same and click on Submit.
Note:
On submitting the OTP, the window will auto-populated the Token Generated, Sek & Expiry on the information. To set-up auto Email forwarding, from GSTN registered mail-id to different mail-id (if required), click on Email Forwarding Settings Help.
Enabling API Access in GST portal
To enable API Access in GST Portal, follow the below steps;
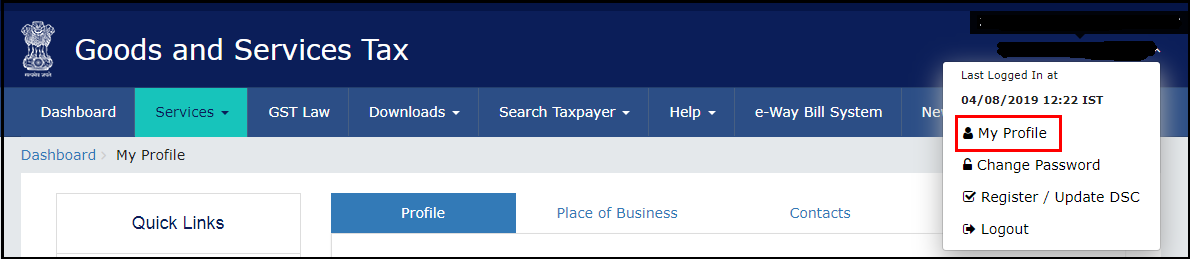
Step 1: Login to GST Portal using login credentials for the portal. In the Dashboard, go to My Profile.
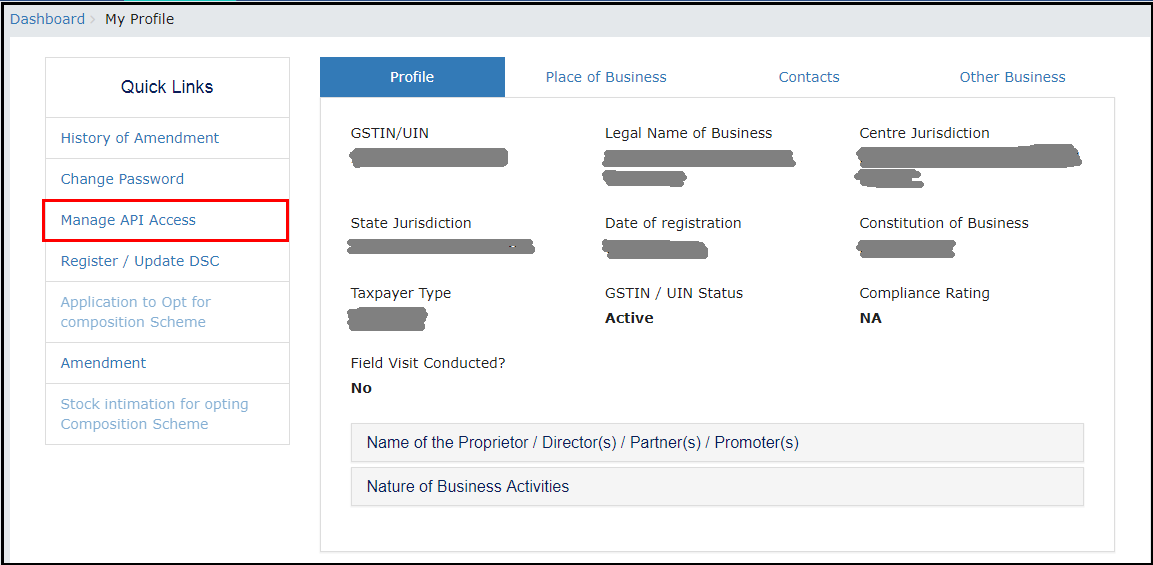
Step 2: In My Profile and click on Manage API Access.
Step 3: Select Yes for Enable API Request and select the Duration for 30 Days from the dropdown. Now, click on Confirm.
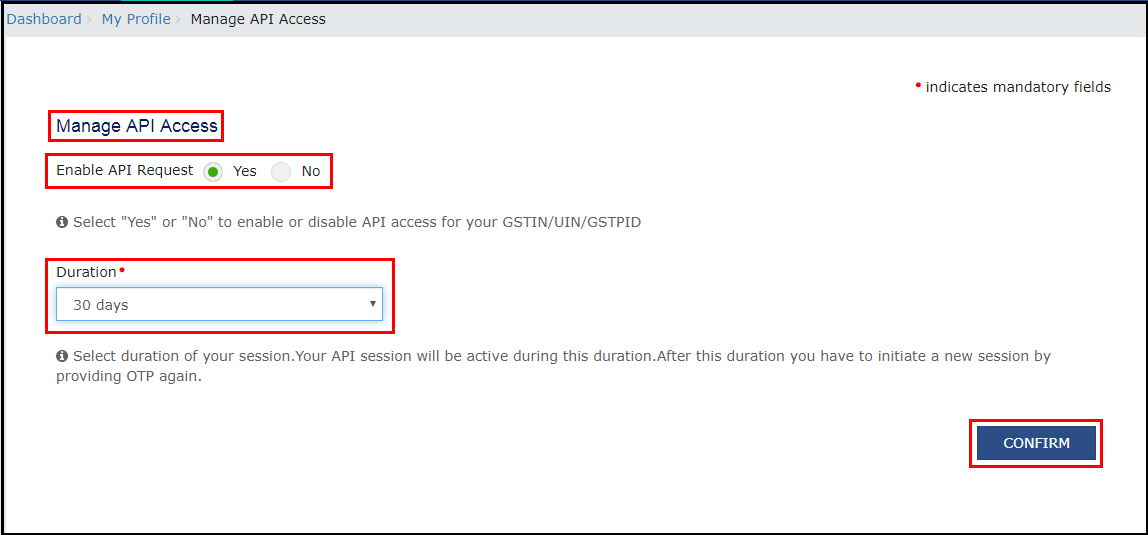
Now the OTP authentication process will be active for 30 days.
To sum up, this is the OTP management in Saral GST. Let us know your thoughts on this post by commenting below.