
Hello and welcome. In this post, we will discuss the steps to generate GSTR -7 using Saral GST software.
Steps to generate GSTR -7 through Saral GST
You can either go ahead and read the post or watch the videos in which we have shown how to do the processes.
Creating a New File
To create a new file in Saral GST for Filing GSTR7, go to File -> Create File and enter the file name. On entering the details, the file will be created and the Assessee Master will be displayed.
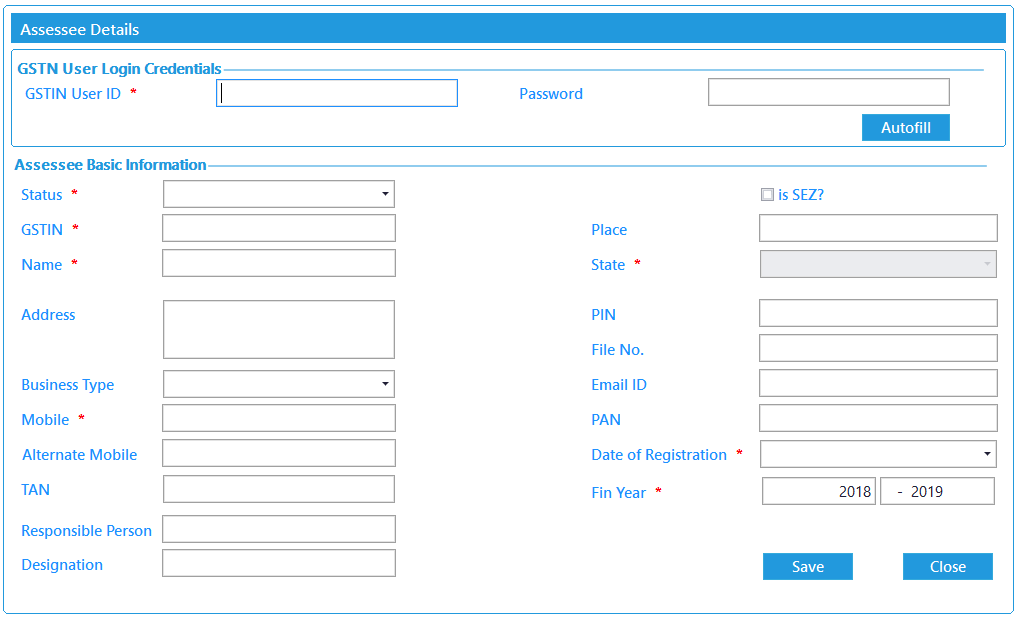
In this screen, enter the required details and save.
Note: The status field will always be set to the Government Department as the filing is applicable for specified status only. The GSTIN to be entered is the GSTIN given on registering as TAX DEDUCTOR with GSTN.
Entry/Import of Transaction
The invoice can be entered in Saral GST in 3 different ways;
- Manual Entry
- Import from Excel
- Import from Json File (Downloaded from GST Portal)
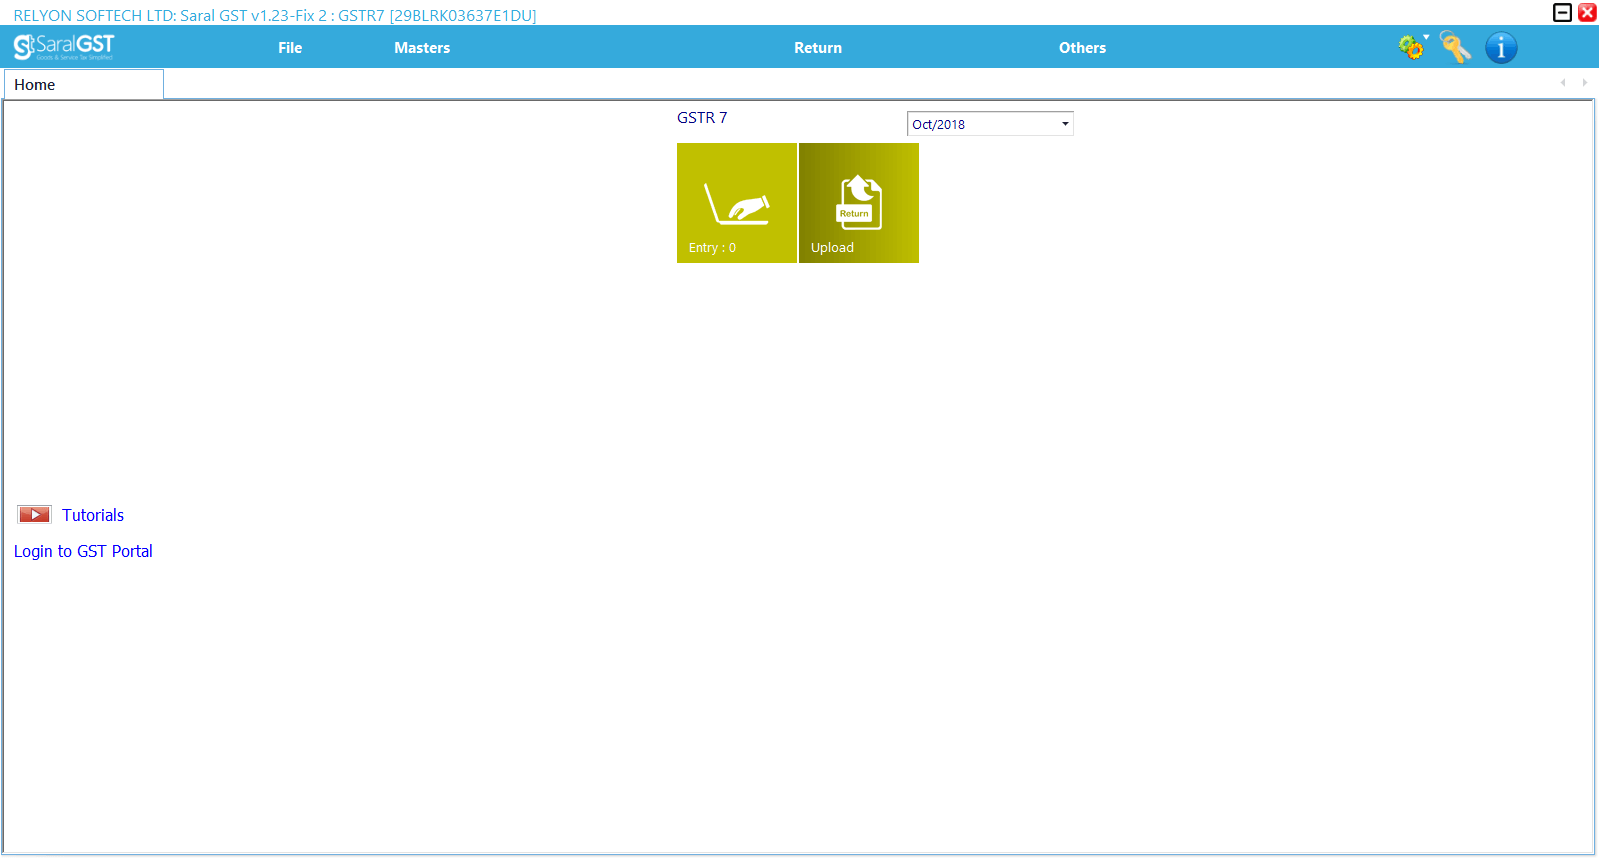
Manual Entry: Goto GSTR7-> Entry. Select the Month of filing & required Category of the entry (i.e. TDS or TDS Amendments).
Click on Add Button
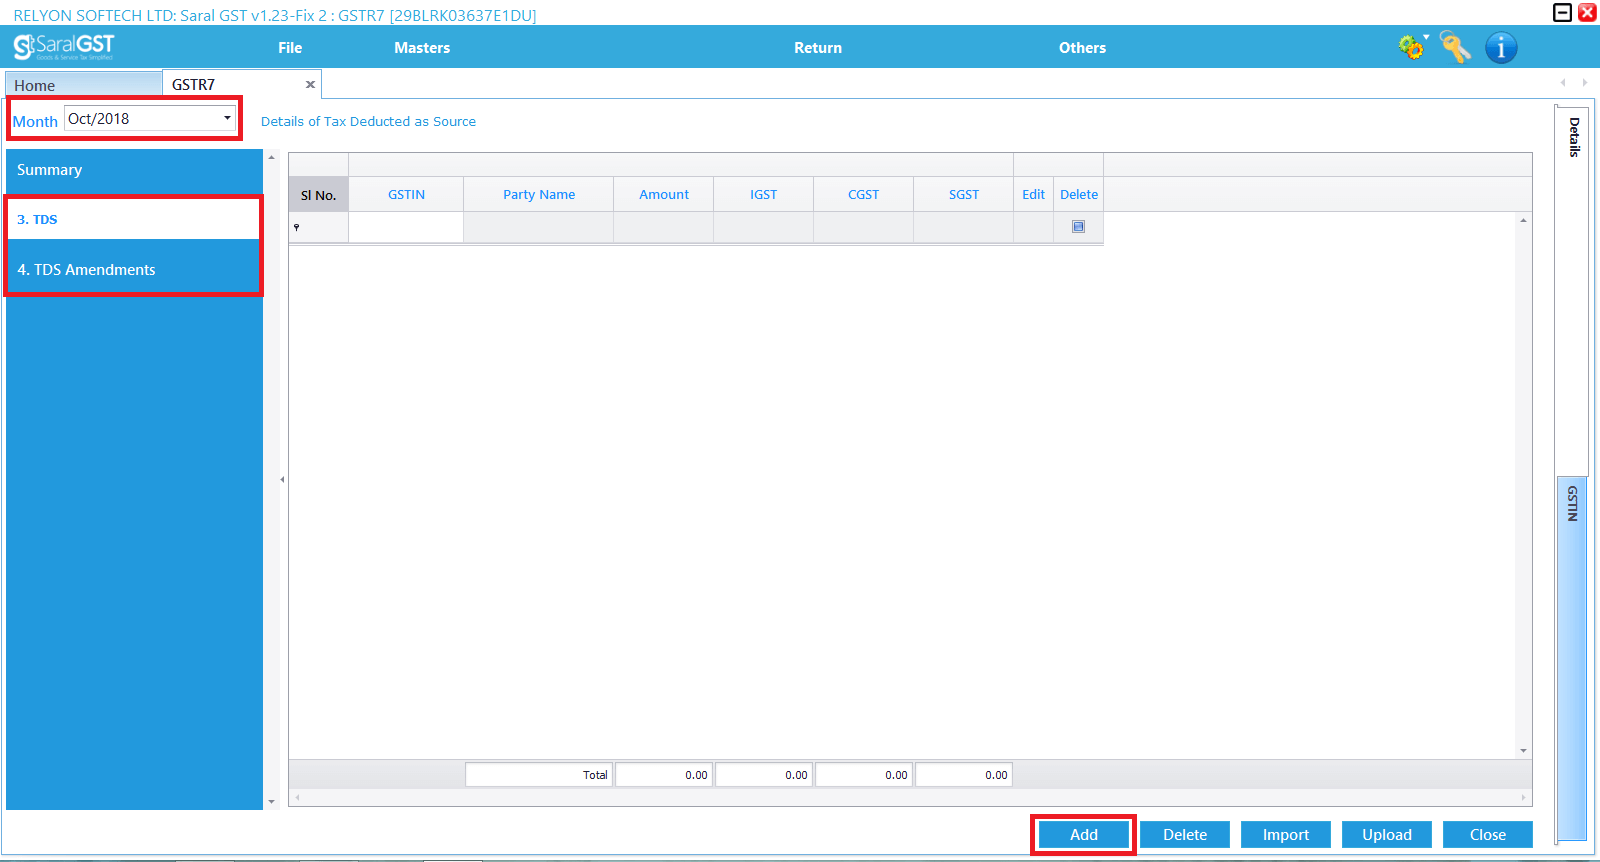
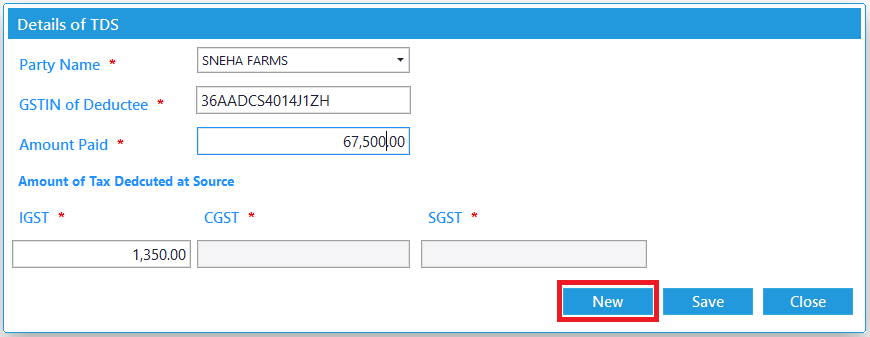
Here, Click on New and add the Invoice details.
Note: All fields having the asterisk mark are mandated to be entered. Tax Type and the amount will be auto taken depending on the Party GSTIN.
Import from Excel: Goto GSTR-7-> Entry. Select the Month of filing. Click on the Import Button.

Select on Saral GST and click on Template. An Excel template will be downloaded. Enter the invoice details in this template.
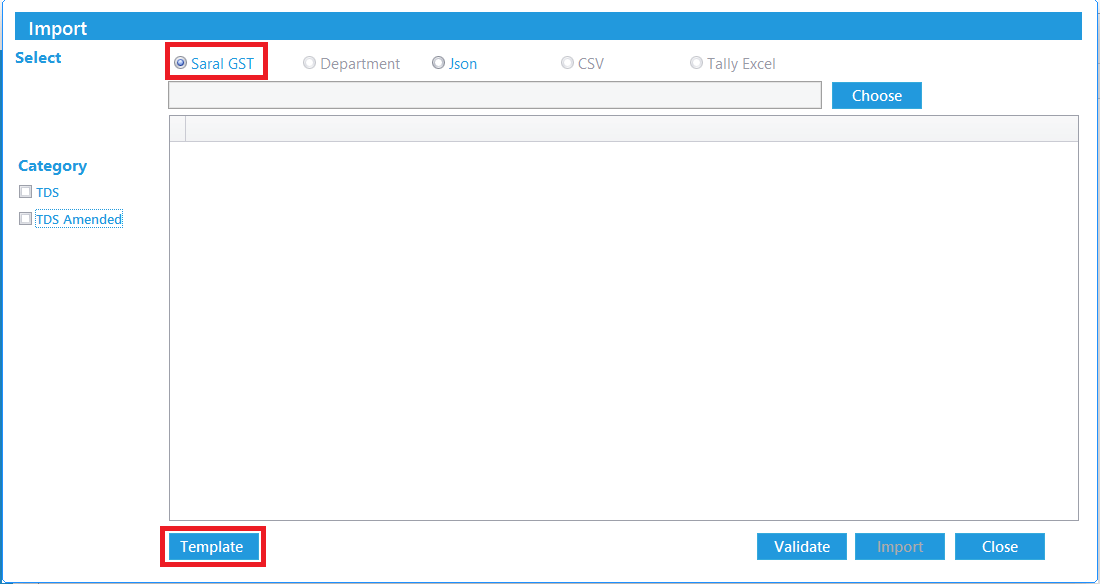
Now, Click on Choose and select the excel template containing the invoice details. Select the Category if any specific data has to be imported else Select all Categories.
Validate the data for any error by clicking on Validate and if no error found, click on Import to import the details to the software.
Note: Enable “Skip if data already present” to avoid duplication of data on import.
Import from Json File (Downloaded from GST Portal): Invoice details entered in the GST Portal can be downloaded in Json format which can also be imported to Saral GST.
To download Json file, goto GST portal -> Login -> Return dashboard. Select the FY and period of filing. Select on GSTR7 -> Prepare Offline -> Download. Click on Generate file. A Json file will be generated & downloaded.
After downloading the file, Goto Saral GST -> Entry -> Import and select the option Json.
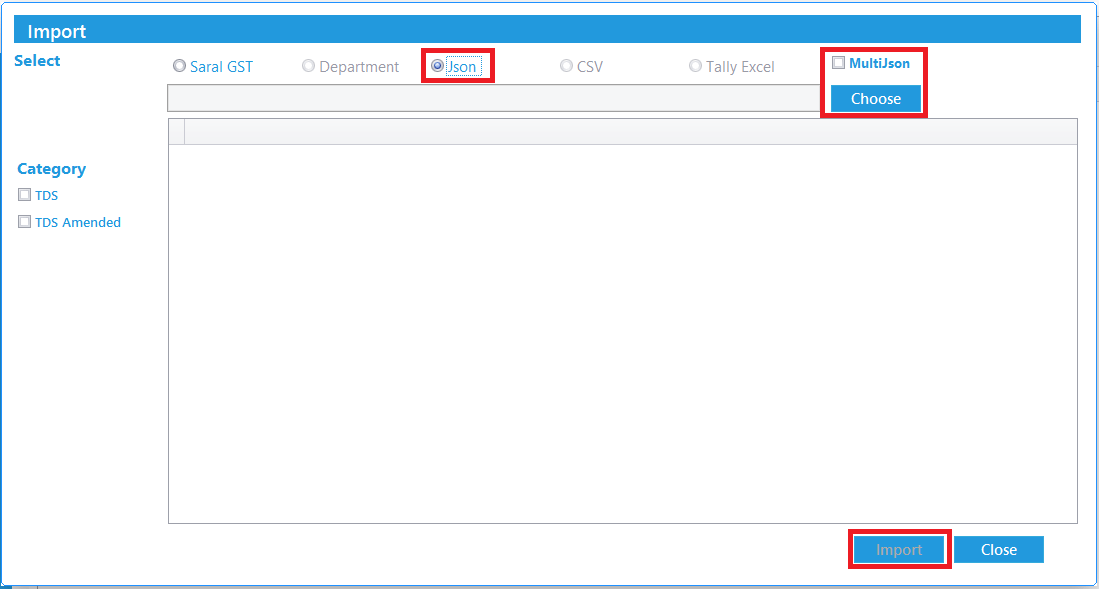
Now, Click on Choose and select the Json File containing the invoice details. If multiple Json files are downloaded, enable MultiJson check box to import the details from all the files.
Click on Import to import the details to the software.
Json File creation and upload
Create Json file: To create the Json File, goto GSTR 7-> Upload

Here, select the type of Upload. The different types are
-
- Monthly one time-> If uploading the complete data once in a month
- Category Wise -> To upload the details of the specific category.
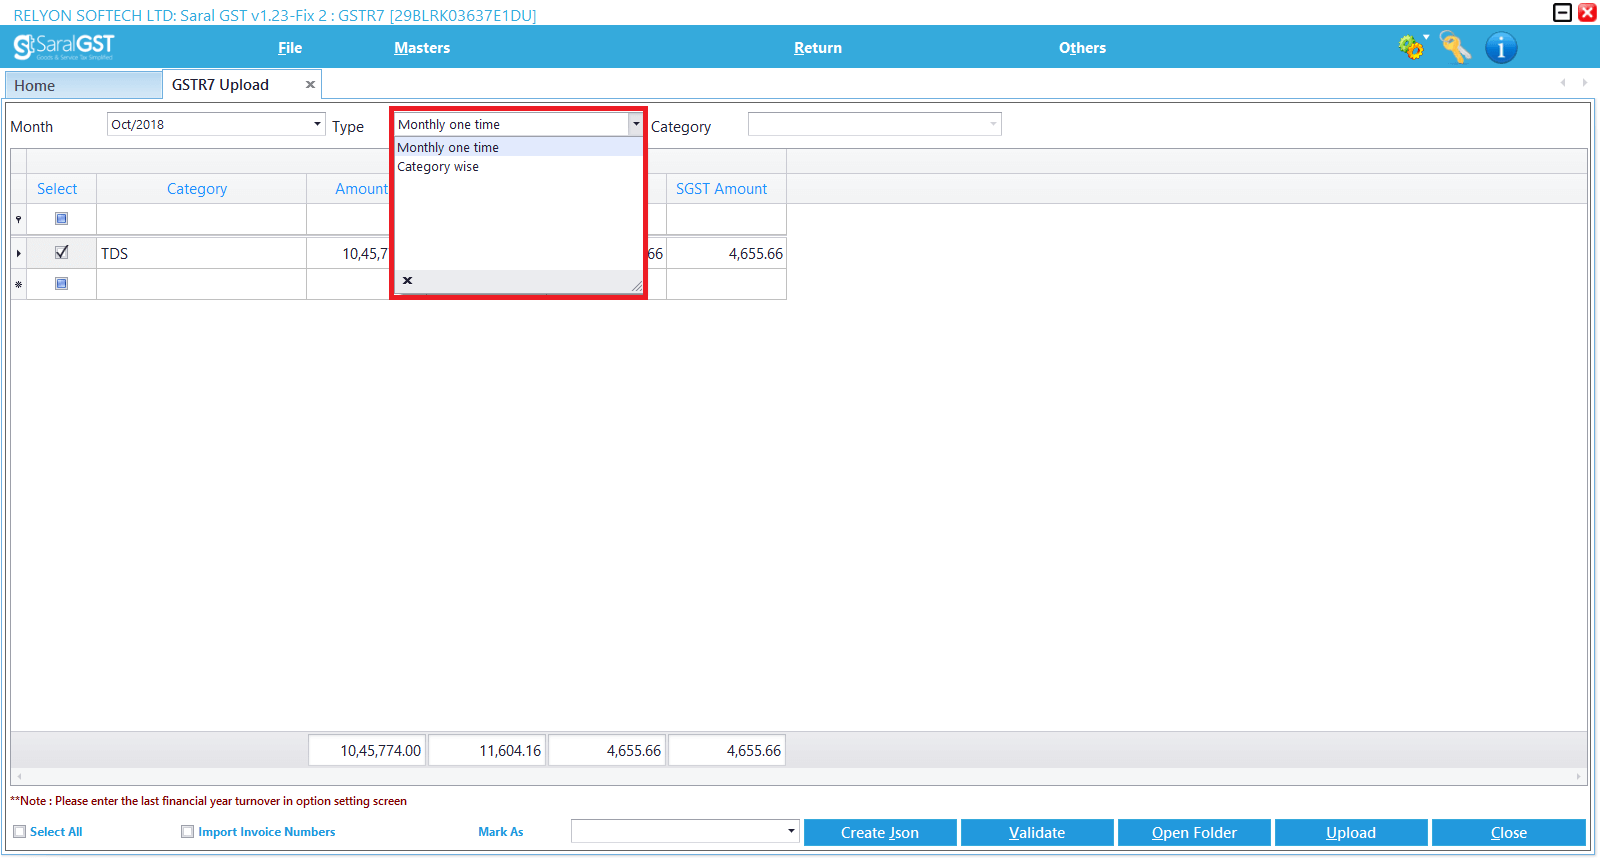
Select the required category or details and click on Create Json Button to create the file.
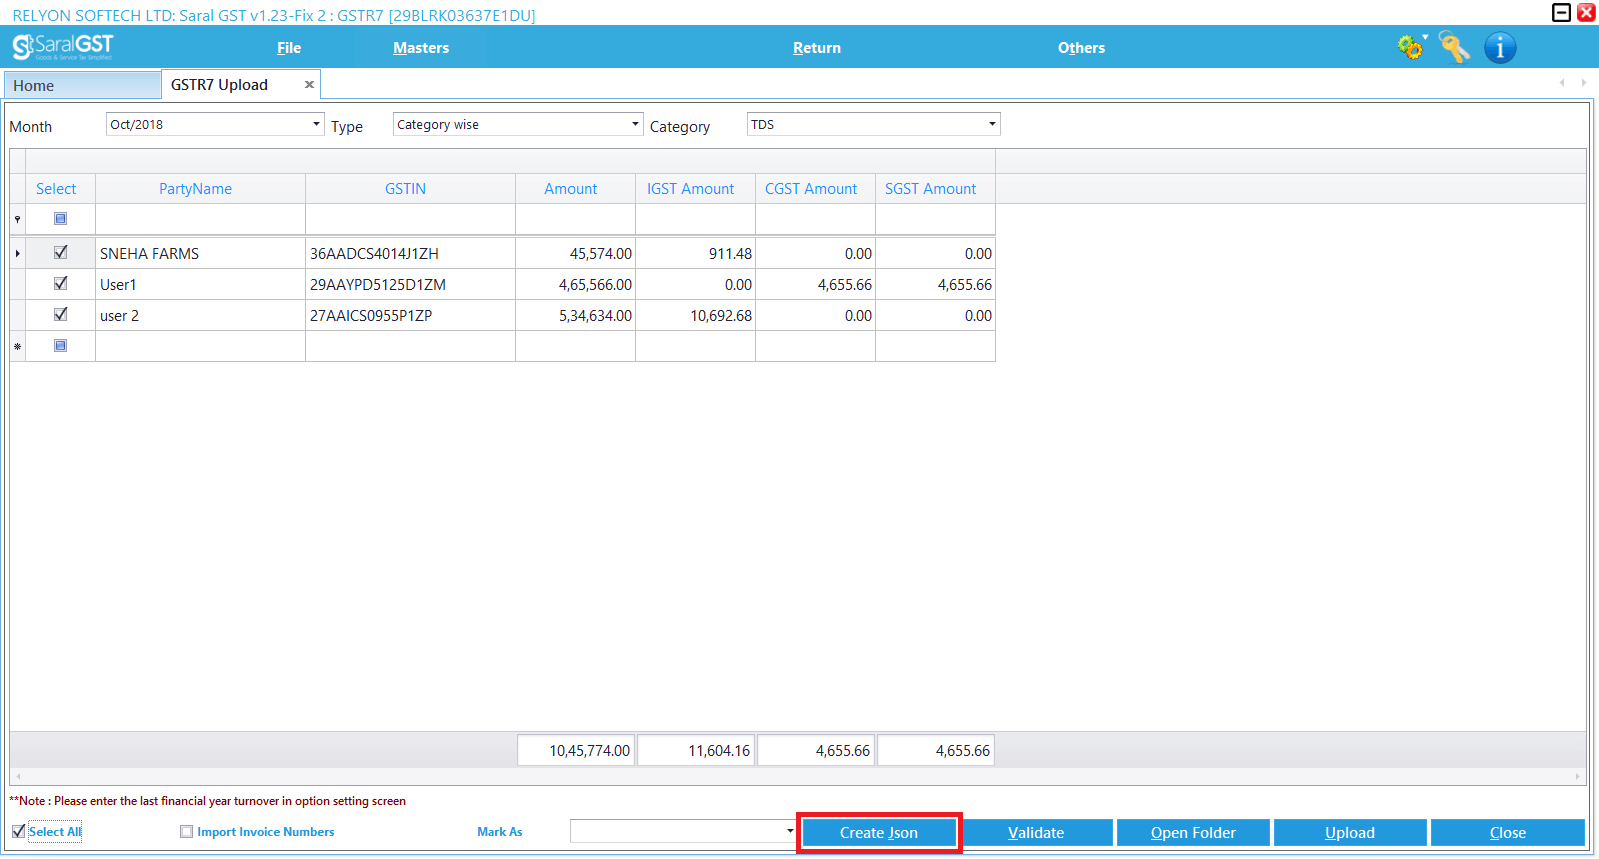
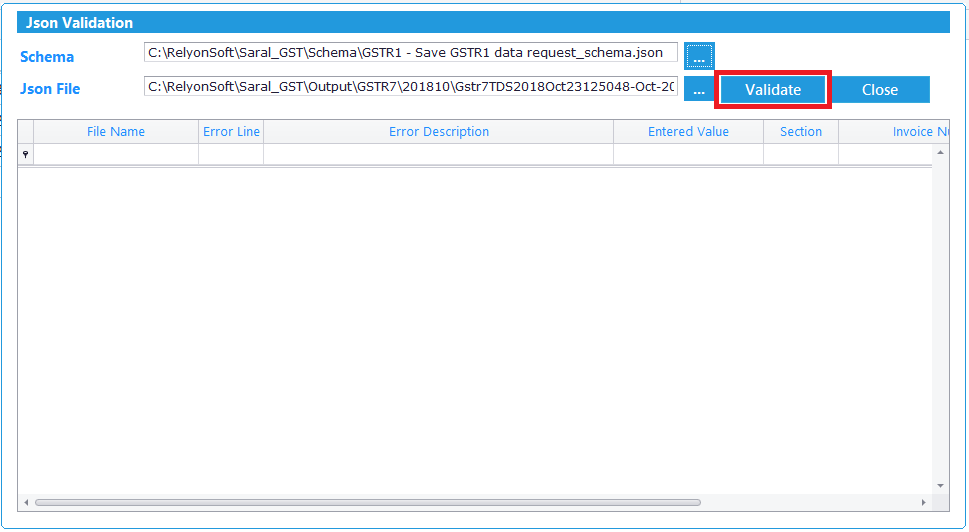
On creation of the file, Click on Validate. This will lead to a validation screen where the data in the file created is validated against the schema. If any error is found the same will be shown which has to be rectified and again validate till no error is found.
Json Upload: After validation, now the file is ready to be uploaded to GSTN. Click on Upload to upload it to GSTN.
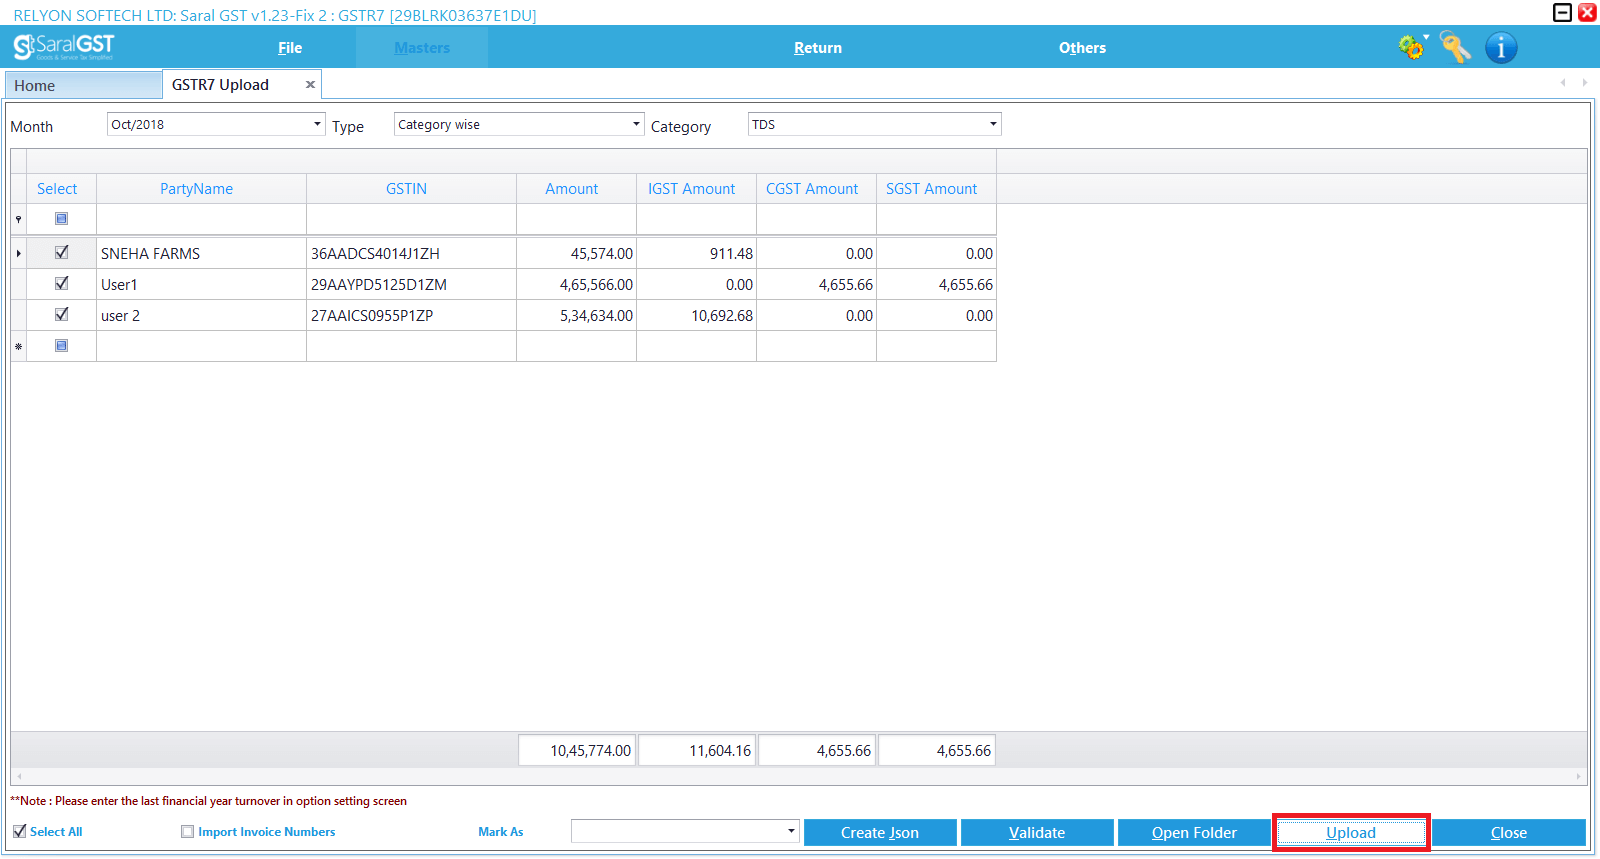
You will be redirected to the GST portal login. The Json file created will be uploaded in the GST Portal. On upload, if the Error Report shows as NA, then Json file is uploaded successfully or else download the error report generated, rectify the errors and upload the regenerated Json file.

After upload of details to GSTN, mark the uploaded details as marked in SARAL GST.
You can also learn about GSTR-7 in general